Rubik's Cube image generator
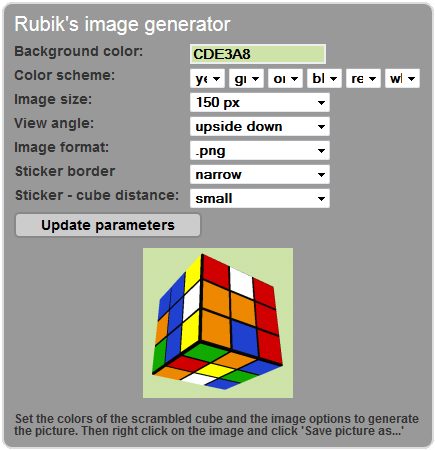
 Save scrambled Rubik's Cube patterns as images with this free and easy image generator. Open the online Rubik's solver program, set the scrambled cube and click the generate image checkbox. This will bring you to the bottom of the page where you can set up the look and feel of your image: Background color, Color scheme, Image size, View angle, Sticker border, Sticker - cube distance. There are three available formats: png, jpg, gif.
When all the options are set up click the Update parameters button, right click the generated image and save it to your computer.
The iCube .php image generator

Thanks to the iCube .php image generator you won't have to draw Rubik's Cubes in paint or photoshop if you want to display them on a website or just simply save some patterns as pictures. With the online application created by Josef Jelinek it will be easy to display the puzzles.
Features:

- Open source
- Easy to use, and install
- Antialiased, nice looking output
- Renders any NxNxN cube sizes including 2x2x2, 3x3x3, 7x7x7 and beyond
- Configurable background
- Configurable image size
- Supports different view angles
- Different image formats: .gif, .png, .jpeg, .jpg
- You can specify the border width and how far the stickers are floating from the cube body.
How to use the image generator?
First you have to download the source code of the Rubik's Cube image generator, save it as a .php file and place it on a web server where php is installed. Then open the source of the file you just created followed by the cube pattern and other url parameters. For example: rubiks-cube-image.php?fl=xgpxbyxoxybywwyyyyrrrrrrooo.
Url parameters
After you installed the php on the server you have to configure the cube through url parameters. Use the following variables after the .php? and separate them by an & character:
- fl: specify the color pattern of the cube. Only three faces of the cube are visible so in the case of a 3x3x3 cube you have to specify one-by-one the colors of 27 fields beginning from the top layer upper corner: grey (x), green (g), pink (p), yellow (y), orange (o), blue (b), white (w), etc.
 Example: rubiks-cube-image.php?fl=xgpxbyxoxybywwyyyyrrrrrrooo
 - bg: sets the hex code of the background color. The default is white (FFFFFF)
Example: rubiks-cube-image.php?bg=B7004D&fl=xgpxbyxoxybywwyyyyrrrrrrooo - size: The default size is 100x100 but you can make your image smaller or bigger with this parameter
Example: rubiks-cube-image.php?fl=xgpxbyxoxybywwyyyyrrrrrrooo&size=500  n: You can display any NxNxN cube, the default is 3x3x3. Here's how you can display a 4x4x4
Example: rubiks-cube-image.php?n=4&fl=xpxyowrrbygywygowbgwyowrrxyorgybrrwyrwybwyowbgwb- m: Sets the view angle of the cube. It can be x,y,xy.
Example: rubiks-cube-image.php?n=4&fl=xpxyowrrbygywygowbgwyowrrxyorgybrrwyrwybwyowbgwb&m=x  f: set the format of the Rubik's Cube: .gif(dithered), .png, .jpeg, .jpg(blures the image)
Example: rubiks-cube-image.php?f=jpg&fl=ywywywywybgbgbgbgbrorororor- b: Stickers border width (0..200), the default is 25
- d: The distance between the stickers and the cube body. (0.100), the default is 5
