Finishing Off the First Two Layers
 For the third lesson, the next two steps of the cube are covered in one. This is because they are very similar stages and both use similar setups, so it's easy to learn them together. At the end of this lesson, a student should be able to solve the first two layers of the cube, which should be a massive confidence boost, especially with the slow, difficult start that was covered in the previous lesson.
The cubes can either be distributed with solved crosses or completely scrambled. This is dependent on how quickly students are able to solve the cross again. If you don't think your students can complete the cross in the first ten or so minutes of the lesson, then it is advised that the cubes are distributed with solved crosses, and in this case students should be told to practice the cross more in their own time.
Recap and Overview
To start the lesson, another short recap is provided on both the first and second lesson contents. If you are confident in the ability of your students to solve the cross themselves, here would be a good time to have them do that. If not, the questions provide a rounded recap including both algorithms so students can make sure they remember them. The following slide asks them to attempt to solve the cross. As the slide says, the students must have cubes with solved crosses in front of them, ready for the next stage.
The students are then introduced to how the next two stages break down. The first layer is completed by inserting the four corners around the cross, and then the second layer is completed by inserting the four edges between the centres. Pictures are provided, and these should help encourage students as the final picture shows a cube with the first two layers done.
Corners and Edges
 Both of the stages follow the same structure, so notes will be provided for both stages at once with some extra notes for individual steps that are slightly different/unique
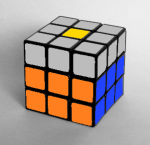
The student is told how to position their cube in order to complete the next step. A picture is provided that shows students which pieces on the cube they are going to be using. They are then told to locate a specific piece (white-orange-green corner, orange-green edge) on the cube and to see if it is in one of the highlighted positions.
The student is then introduced to an algorithm that removes awkward pieces. This term is used to describe pieces that are seemingly locked in between pieces you have already inserted, so algorithms are used to guide students through the process of removing these pieces whilst keeping their progress undisturbed.
The students are then told to position the specific piece located earlier using both the awkward algorithm and any additional U moves that may be required.
For the corners, the algorithm that is used needs to be repeated as many as six times before the desired outcome is reached. This is different to the edges in which the algorithm is performed once for each edge insertion.
In both cases, the algorithms that remove awkward pieces are the same as the algorithms to insert the correct pieces (the edges have two algorithms, of which the awkward piece algorithm is the same as one of them). This is done to minimize the number of complicated sequences the students have to learn. For the corners, the student is told to perform this algorithm as many times as needed and is given picture guides to show them the solved position that they are looking for. For the edges, this is not necessary. For both, the algorithms are provided and a picture is shown telling students which orientation they need to hold their cube in.
The next slide shows animations of each of these steps taking place. Some of them move fairly quickly, but students must be ensured that these are only the algorithms that they have already learnt being done.
The penultimate slides lay out the steps that need to be performed to each piece that needs to be solved. These should be left up whilst students attempt to solve all four pieces for each stage.
Finally, the students are shown the progress of the solve and congratulates them on what they've achieved.
Additional explanation
Follow these links to find out more about the solution of the white corners and middle layer edges!
 Download The PowerPoint Presentations from Google Drive