Master Pyraminx Overview and Tutorial
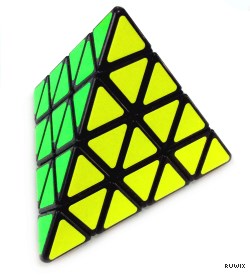
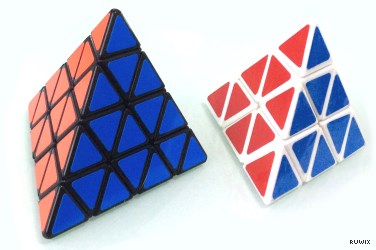
The Master Pyraminx is a well-known adaptation of the immensely popular Pyraminx. First conceived in 2002, the Master Pyraminx was, until recently, a collector’s item, as the original designer only created a handful of them in 2006. However, as of 2016, there is now a mass-produced edition by ShengShou. This puzzle is often referred to as the 4x4 Pyraminx, as its increase in size is similar to that of the 4x4 in comparison to the 3x3 Rubik’s Cubes.
Overview
A lot of the solution for the Master Pyraminx is based on concepts learnt from solving the original Pyraminx. The Pyraminx is really easy to solve, so it is imperative that you know how to do so before you start with this tutorial.
This tutorial will also require basic knowledge of how certain moves affect different pieces on the puzzle, which can be acquired by playing around with a Pyraminx and seeing what you can do.
The steps required to solve the Master Pyraminx are as follows:
- Solve the 3 edge centres on each side.
- Adjust the top layers and the tips.
- Solve the actual centres.
- Solve the top three edges.
- Solve the bottom six edges.
- Solve the last middle three edges.
 The notation for the Master Pyraminx will be done in a similar way to the notation for a regular Pyraminx, except with an extra layer. Knowledge of standard Rubik’s Cube and/or Pyraminx notation is required:
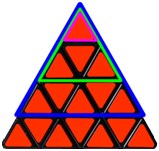
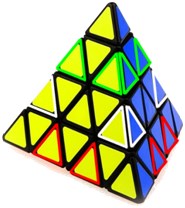
- U, L, R, B – These moves reference the top sections of the puzzle (indicated on the image in green).
- Uw, Lw, Rw, Bw – These moves reference the top two layers of the puzzle (excluding tips) (indicated on the image in blue)
- u, l, r, b – These moves reference the tips of the puzzle (indicated on the image in purple)
Tutorial - How to solve the Master Pyraminx
 The first step involves solving the 3 edge centres on each side. This refers to the three pieces highlighted by the image. This can be done in the same way as solving the edges on a standard Pyraminx (in the first step of the Pyraminx solution), however instead of where you would do U, L, R and B moves on the standard Pyraminx, you do Uw, Lw, Rw and Bw moves. You should be able to do this without any help, considering that you already know how to solve centres in this way on a smaller puzzle.
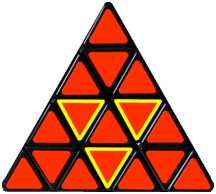
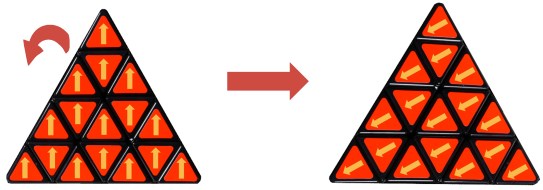
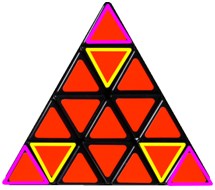 Once you have the first three centres solved, you can complete the rest of the centres for the puzzle. This is, once again, an intuitive stage. Think of this like solving the tips on a regular Pyraminx. The tip is either solved or requires a U or U’ move to solve. Just do the same here so the yellow highlighted pieces match in colour with the pieces you solved earlier.
Finally, you can adjust the tips. This can be done in the exact same way as the above step (i.e. the same as the tips on a regular Pyraminx), but using u, l, r and b moves this time. The tips are highlighted in purple.
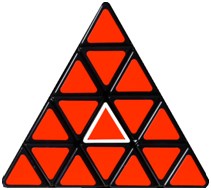 The last step of the overall centres section involves solving the actual centres on the puzzle (i.e. the piece in the exact centre of each face). This piece is highlighted in white on the adjacent image. There are three different cases for the centre pieces:
- All 4 solved
- All 4 unsolved
- 1 solved, 3 unsolved
If you have all 4 centres solved, then you can skip this stage but remember it for later if you try to solve it again and come across a case that requires an algorithm.
If you have all 4 centres unsolved, then the algorithm to solve them is very simple. The centres will be swapped in pairs, for example the yellow and blue centres will be on the blue and yellow sides etc. Simply place one of these centres on the front face and the other on the bottom face (this will place the two other unsolved centres on the back faces) and perform this algorithm: (Rw’ Lw Rw Lw’). Do this algorithm three times to solve the centres.
 If you have only 1 centre solved, then hold this centre on the left of the puzzle. Then perform this algorithm: (Rw Uw Rw’ Uw). Do this algorithm twice. If the centres are still not solved, do it another two times.
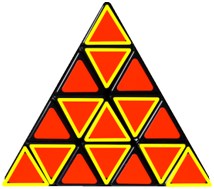
Now this section is done, the pieces highlighted in the adjacent image should be solved on your puzzle. This entire section is the equivalent of solving the three centres on each side and the tips on a regular Pyraminx.
 The remaining edges are solved in three parts:
- Top three edges
- Bottom six edges
- Middle layer edges (white)
The image shows the edges referred to above (text colour = edges).
The majority of the edge solving section is intuitive. It should be solvable using what you know about Pyraminx edge movement, but here is a short overview for each section that explains how you should go about it:
The concept of pieces and slots
 When solving the edges of the bottom layer of a standard Pyraminx, you most likely use a method that involves inserting pieces into their slots. The solved centres determine the slots and the stickers on the pieces determine the pieces. Moves are made that specifically preserve what is already made. For example, if you wanted to get Piece A into Slot B, you would have to do a specific set of moves. The simplest way would be by doing U’ R’. This would place the edge, but it would misplace Centre C. To avoid misplacing the centre, you need to insert the edge into the slot between the two pieces, not just in the position. This can be done by doing R U’ R’. The R move at the start brings the slot to the same layer as the piece, which allows for the piece to replace the one in the slot.
This is what is meant when the concept of moving the slot to insert the piece.
Likewise, on the Master Pyraminx, the slots in the top of the puzzle have to be moved to insert the pieces. You can insert the pieces by doing wide moves to place them in the top layer. If the piece you’ve placed in the top layer is flipped, then it is not the right piece. It is important to remember that there are two edges instead of one (just like the 4x4 in comparison to the 3x3), so these need to be differentiated between.
You can perform a wide move to insert the first edge piece in its correct slot (the centres pieces on the top layer determine the correct slot), then do a U or U’ to move the slot out of the way, then invert the wide move to restore the centres. This will leave you with one solved edge on the top layer (one edge between two centres that match the edge stickers) and every centre back in its original place. The same thing can be done for the second edge, but for the third edge you need to utilise the concept of moving the slot to insert the piece. It’s not possible to simply move the piece into the top layer, because there are no empty slots in the top layer to replace it with. Therefore what you can do instead is do the same wide move but in the opposite direction to bring the slot down to the piece, insert the piece into the slot, and move the slot back to its original position.
Note: It doesn’t matter how many setup moves you do in order to get the correct edge into position to be moved up as long as you undo all of the moves in order afterwards.
The same concept is applied with the bottom layer edges. Simply rotate the puzzle so that your bottom face is now the front face (this should move the solved top layer to the back of the puzzle, out of the way). This will give you a new top layer. You only have to solve the two edges facing toward you at this point (i.e. the edges that are on the bottom of the puzzle when it is upright). After these are solved using the same style of solving as for the original top layer, rotate the puzzle so that you still have the same face pointed towards you but so that you have two more unsolved edges on the new top layer. The rotation is shown in the images below. Do this once more and you’ll have all 6 bottom layer edges solved, so you can rotate the puzzle back (put the bottom face back on the bottom of the puzzle).
Finally, all that remains unsolved are the middle three edges. There are only three cases for this, and only one algorithm required. There are two ways in which the edges can be cycled, or the edges can be solved. If they are solved, then you’re already done. However, if they need to be shifted, then do the following algorithm from any orientation with the three edges to be solved in the middle layer: (R U R’ U). Do this algorithm twice. If the puzzle is not solved, then do it two more times. Your puzzle will now be solved.