Online Rubik's Cube Mosaic Generator
If you're looking for a fun and unique way to show off your photos, your can turn them into a Rubik's Cube mosaics. With our free online generator, you can easily convert any image into a pixelated masterpiece. Just upload your photo, choose how many cubes you would like to use for the project and we'll give you the steps and scrambles.
![]()
Rubikubism is the art of creating images using Rubik's Cubes. It was invented by Danish artist Ole Kortzau in 2006 and has since been used to create everything from portraits to landscapes.
Do You Have The Tools?
 Unfortunately, puzzle cube mosaic building is not an accessible hobby to anyone because it requires you to have lots of cubes. Cheap cubes are accessible starting from around $2, while the best speedcubes are above $100. So the price of such an art piece can be really high. Here's a list of what you can do depending on the size of your 3x3 cube collection.
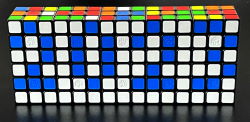
- 1 cube – don't worry, you can still make nice cube patterns.
- 10 cubes – write a short text like 2023 for
- 30 cubes – draw basic cartoons, like Mario (see the top of the page)
- 100 cubes – Gan Cube sells mini cubes especially for mosaic building, making this hobby more accessible for anyone. Grab their 36 ($50) or 100 ($120) pieces bundle with a stand and special tools.
- More – things start getting interesting. See our gallery for inspiration.
What Images to use for Rubik's Cube Mosaics?
Start with a high-contrast picture for the best results. It's recommended to use an image editor to increase the contrast and remove the background or crop the image to put more focus on the subject.
How To Generate A Rubik's Cube Mosaic Project?
 1. Upload the image 🡁
Scroll to the top of this page and upload an image. You can simply drag and drop the image file in your browser.
2. Initial settings 🔧
After the image is processed you are taken to the next step where you can preview the uploaded image. Select the dimensions of the art piece (aka how many cubes you'd like to use). Besides the regular 3x3x3 cube you can change it to work with up to 7x7 cubes.
Crop the image, dragging the bottom right corner of the highlighted area. Zoom in or out with a mouse scroll.
When everything is set, click the Next button.
3. Pick a design 👔
The program will show you several design suggestions, depending on how to display certain colors. This is where you can customize the colors if your cubes don't have the regular color scheme. Click on the best-looking image to go to the next step.
4. Final adjustments 🛠
Preview your final result, and increase or decrease the amount of the used colors. In this step, you can download a .png file where each pixel represents a cube sticker.
Open the advanced settings to change the plastic color, blur preview, and change the size of sub-section blocks in your PDF file. Enable options like output bottom-to-top, draw letters, and black-and-white PDF.
5. Download your PDF file for the project 🡃
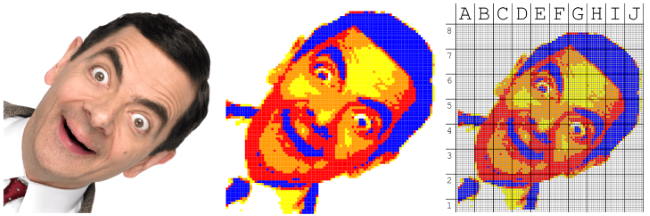
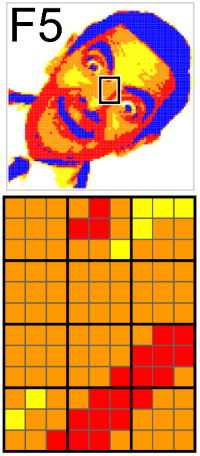
In the downloaded PDF file you will see the image divided into sub-sections, marked with letters and numbers.
Please don't print that file to save the environment.
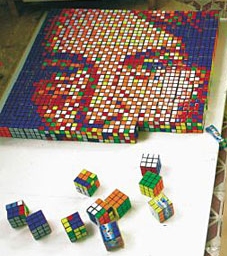
Need some inspiration? Check out our gallery of recent projects to see what others have made.
Many thanks to Roman Strakhov for developing this open source program. Please support his work or check this project on Github
buttonpresser.com
Would you like to check mine out?
youtube.com/cubecreators