Dino Cube
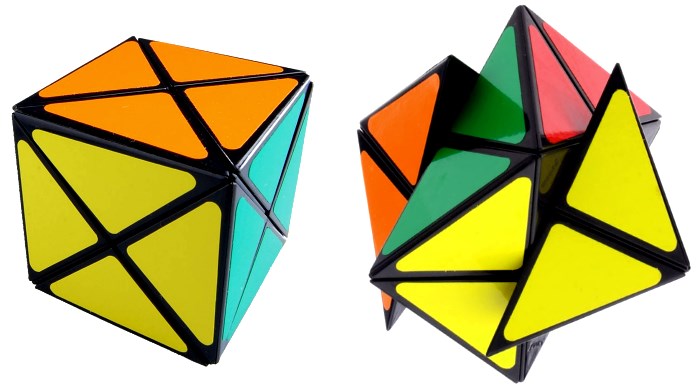
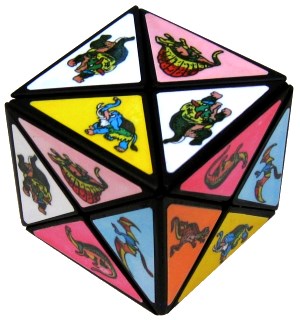
The Dino Cube is a basic puzzle that is reminiscent of a Skewb in the way it appears and the way it turns (although not quite the same). Invented in 1995 by S. Y. Liou, the Dino cube came in 4 different versions, all produced in the nineties: The 2-colour version, the 4-colour version, the 6-colour version, and the Dinosaur version (a standard 6-colour Dino Cube with dinosaur pictures on each sticker). The puzzles were originally known as “Corner-Turning Cubes”, and they’re actually quite simple to solve. Today we will go through the solution of the most common variant, the 6-colour dino cube. The same steps can be applied to the 2 and 4-colour versions, but these should be even easier to solve and, once you can do the 6-colour one, the others are simple.

Pieces
For the sake of simplicity (and due to the nature of the puzzle), we will refer to each section that can be twisted as a corner. There are no corner pieces on this puzzle, so this shouldn’t cause confusion.
The individual pieces will be called edges, also for the sake of simplicity.
Notation
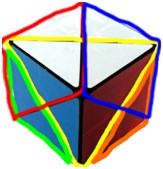
 When holding the Dino cube at an angle (see picture), the Dino Cube shares the same notation as a Skewb. The following moves can be applied:
- LR – A clockwise rotation of the lower-right corner (the section highlighted orange on the adjacent image is the lower-right corner)
- F – A clockwise rotation of the front corner (the section highlighted yellow on the adjacent image is the front corner)
- LL – A clockwise rotation of the lower-left corner (the section highlighted green on the adjacent image is the lower-left corner).
- UR – A clockwise rotation of the upper-right corner (the section highlighted blue on the adjacent image is the upper-right corner)
- UL – A clockwise rotation of the upper-left corner (the section highlighted red on the adjacent image is the upper-left corner)
- F’ – A counter-clockwise rotation of the front corner.
Overview
The Dino Cube is solved by following this fairly simple method. It requires no algorithms and is very intuitive. It also has no parity.
- Solve the first face
- Solve the edges of the middle layer
- Complete the last layer
You do, however, need to know the colour scheme of your puzzle. If you don’t follow the colour scheme during the first step, then the puzzle become unsolvable (just like solving opposite centres adjacently on a 4x4).
Solving the first face
The first face is pretty easy to solve, and it can be done intuitively for the most part. You can choose to start with any colour, but if your puzzle has a white/black face, this would be the advised starting point (most Dino cubes available nowadays have the same colour scheme as a standard 3x3, so if you’re familiar with solving the cross on white on a 3x3, you might want to stick to the same strategy here. This tutorial will assume you’re solving the white/black face first.
Knowing the solution of the Rubik's Cube is a big advantage. The first stage is to solve the first face. You can choose any face to start from, so if there are two solved white edges on one face, that might be easier to start off with. The first face is solved in a similar way to the Skewb first layer and the 3x3 cross. Try and place the first three edges just like a cross. The only difficulty you should run into is when trying to place the last edge.
Once there are three edges in place, locate the final piece and try to insert it. By inserting the last edge, you will kick a currently solved piece out of its place, but that is fine. You can move the now-solved piece out of the way and bring back the one you just kicked out. Finish the first layer by bringing the last piece back into place. This combination of moves where you disturb a solved piece to solve another, move the solved piece out of the way, and bring back the piece you just disturbed is known more commonly on other puzzles as a Sledgehammer. This should also be intuitive if you have prior knowledge of other twisty puzzles such as the 3x3, Pyraminx and Skewb. If you are unable to solve this edge, then you may need to look at some of the more common puzzles to learn the basic movements that you can use to manipulate pieces.
Solving the edges of the middle layer
The middle layer edges are even simpler than the first layer edges. The Dino Cube is unique somewhat, as with one layer solved every other piece on the puzzle can be accessed without having to disturb the first layer. This means that you should be able to place the vertical middle-layer edges between the first layer edges by performing F moves and rotating the puzzle. As always, make sure you don’t disturb the first layer you made earlier. If one of the middle layer edges can’t be solved, then you have probably solved the first layer edges incorrectly (remember: you must solve the first layer edges with respect to the colour scheme, which with white on the bottom and yellow on the top should be red-green-orange-blue).
Solving the last layer
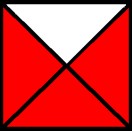
 This is the only stage in which any type of “algorithm” enters the equation. You need to first solve one of the edges entirely. First, locate an edge that you want to solve and find its position. The image adjacent shows what the red face should look like now (the white section should be an unsolved piece on your puzzle). Now you have to locate the final red edge that needs to go into this position.
If the edge that needs to go into this position is on the top at the back, you can solve it by doing this algorithm (note: keep the red face on the right side of your puzzle when holding it at the angle to perform this algorithm):
- UL F’ UL’ F F UR’ F’ UR
If the edge that needs to be solved is on the top to the left, perform this algorithm (note: keep the red face on the right side of your puzzle when holding it at the angle to perform this algorithm):
- F UR’ F’ UR
If the edge that needs to be solved is on the top to the right, perform this algorithm (note: keep the red face on the LEFT side of your puzzle when holding it at the angle to perform this algorithm):
- F’ UL’ F UL
Once you have one edge correctly solved in place, rotate the puzzle so this edge is at the back, and solve the edge that is now in front of you (you should see the same as the above image, but this time the red parts should be orange).
Because two edges cannot be swapped on their own, by solving two opposite edges, you will complete the puzzle.
